Email accounts
This chapter describes how to set up email accounts associated with your store: a general contact email, a sales representative email, a customer support email and more.
To manage Email Accounts, go to Configuration → Email Accounts. The Email Accounts window displays the email accounts of the store owner, as shown below. After the email accounts are configured, the store owner can then select the required email account on the message template details page, as described in the Message Templates chapter.
Add a new email account
Go to Configuration → Email Accounts. The Email Accounts window is displayed:

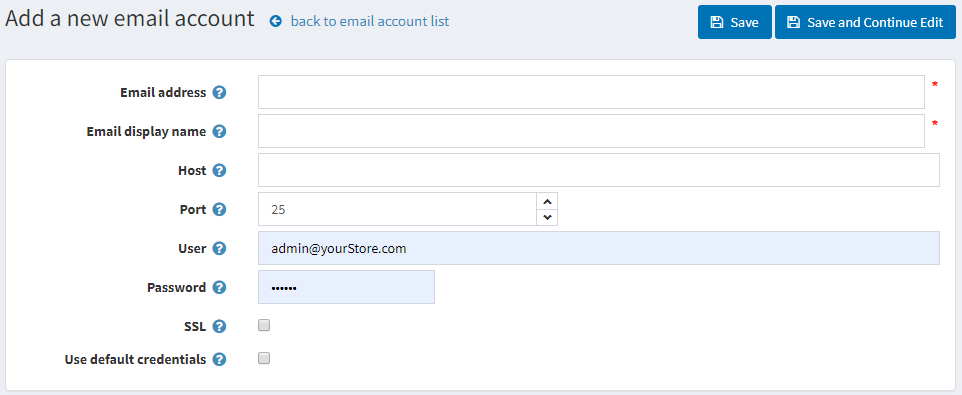
Click Add new. The Add Email Account window is displayed:

Define the following email account information:
- In the Email Address field enter the from email address for all outgoing emails of your store. Example,
sales@yourstore.com. - In the Email Display Name field, enter the displayed name for outgoing emails of your store. Example, Your Store Sales Department.
- In the Host field, enter the host name of IP address of your email server.
- In the Port field, enter the SMTP port of your email server.
- In the User field, enter the user name of your email server.
- In the Password field, enter the password of your email server.
- Select the Enable SLL checkbox, to use Security Sockets Layer to encrypt the SMTP connection.
- Select the Use default credentials checkbox, to use default credentials for the connection.
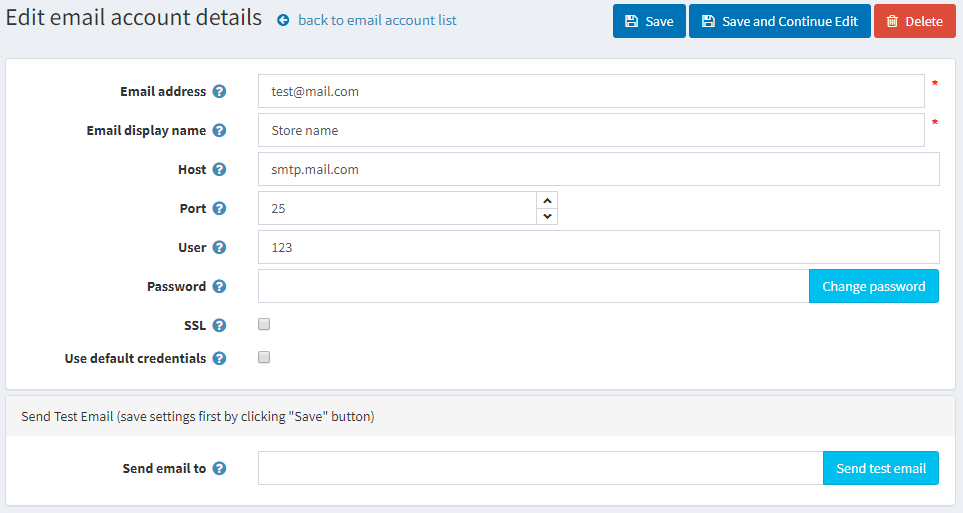
Click Save. The window is expanded, as follows:

In the Send email to field, enter the email address for the test email and click Send Test Email.
